 Getting Started with Your Site
Document Actions
Note: This is the print view with all the tutorial pages on one page. The paginated version is available here, if you prefer that.
Your New Site, Logging In
Welcome to your new web site. This tutorial will take you from a brand-new, freshly minted SimpleSite through logging in to edit it, updating the home page and adding a new page.
What we'll be covering is only the tip of the iceberg in terms of the capabilities of your web site. More help is available in the how-to section of the documentation. And, don't be afraid to play around. You may always just delete or hide your tests.
Would you like to read this tutorial while you experiment? You might just print the tutorial, and keep it by your side. Or, just open up a new browser window and switch back and forth as you experiment.
Starting at the Very Beginning
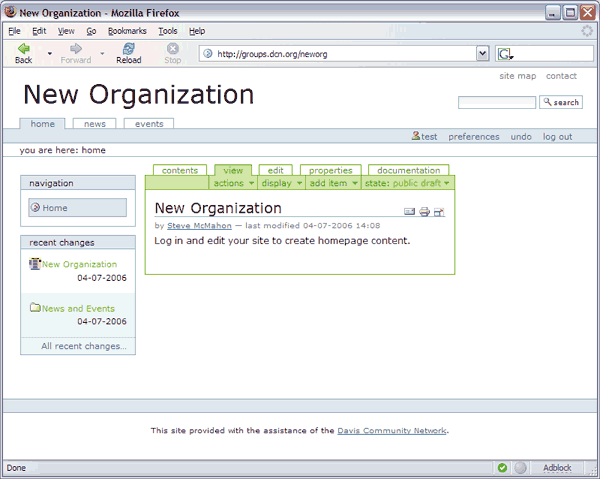
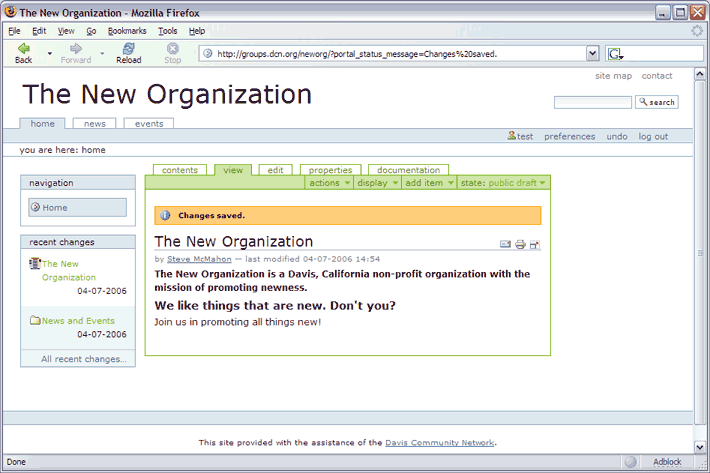
When your new site was created by the web team, you should have been sent a Web address (URL) for your new site. Type or copy it into the address bar of your web browser, and you should be seeing something like the window below:
This is a one-page web site. The title should reflect the name of your organization. The "Log in and edit..." text in the center of the page is boilerplate added when the site was created.
To make changes in the site, we're going to need to "log in." Logging in is the process of establishing that you have the credentials necessary for editing. Those credentials are a login id and password. Both should have been issued to you when the site was created.
 Take a look in the shaded bar under the search form (at the upper-right corner of the page). You should see a link labeled log in. Click on it and you should be transported to a page containing a login form.
If you don't see the log in link, it may have been hidden. If that's the case, just navigate to your site's web address plus "/edit". For example, if your site's address is http://groups.dcn.org/neworg, you may navigate to http://groups.dcn.org/neworg/edit.
The Log In Form
 The log in form asks for your login name (i.e., login id) and password. Type them in to the matching fields and clock on the Log in button.
Both the login name and password are case sensitive. You'll need to make sure that you don't have your keyboard caps lock set, and you'll need to enter the two bits of information exactly as you received them.
The Remember my name function just tells your browser to remember your login name for future use.
If you have trouble logging in, be patient and give it a few tries. If problems continue, contact the web team to make sure you were set up correctly.
 A successful login will take you to a page that confirms your action with the message "You are now logged in." Click on "Continue" to move on to editing.
If you're logging in by directly navigating to an edit page, you'll bypass the confirmation page.
Editing Mode
Logging in to edit will change your page display in some important ways. Look in particular for the green box surrounding the central content area.
The green-bordered area has several options at the top. The tabs allow you to select different views of the current context: its contents, public view, content editor, properties editor and others. The are also several drop-down menus, each of which has a small downward-pointing triangle to indicate that clicking on the item will produce a menu.
Also, you may see some new side-bar (or portlet) boxes that are meant to help site editors. The Recent Changes portlet, for example, lists the most recenly changed content.
Editing the Homepage
If you've successfully logged in to edit your site, you should see a green border surrounding the central content section of the page. At the top of the green box you should find the action tabs.

Two of these tabs are important for our current purposes.
- The View tab: click on this tab to see the public view of the content; and,
- The Edit tab: click on this tab to edit the current content.
Click on the Edit tab to open a form that will allow you to edit your home page.
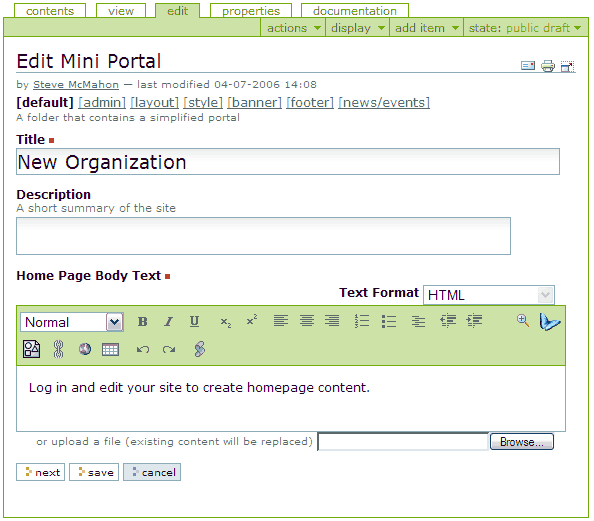
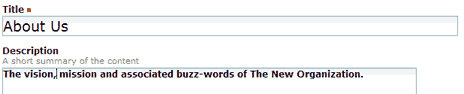
This form has three fields (editable areas): Title, Description and Home Page Body Text. (The body text field has been vertically compressed in the illustration above.)
- Title
- This is the title for the page. It will appear at the top of the page's text, in the title bar for the browser and in navigation lists and search results. This field is special on the homepage because it also sets the title for the site.
- Description
- A short, generally only a sentence or two, summary of what the page is about. This shows up at the top of the page's text and in content lists and search results.
- Body Text
- The bulk of the text for the page. This field is special because it may be more richly formatted. The green-shaded formatting button bar controls formatting.
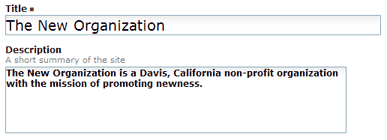 Let's make some changes. First, change the title as necessary to get your organization's name correct. In this case, we're just adding "The" to the beginning.
Then, put the shortest introductory text you can manage into the Description field.
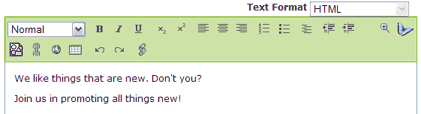 Now, move on to the Body Text field. Type some text into the field. Don't worry about formatting except to press the Enter key at the end of each paragraph. Make your first line be something that you'd like to use for a header.
You should be able to edit the text you've entered via conventional text editing commands.
Now, let's turn that first line into a header. Position your editing caret (which marks the point of action) in the first line and click in the style-selection drop-down (which will initially read Normal).
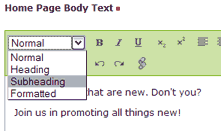 The drop-down style menu should offer some basic text formatting choices.
Choose Subheading from the menu.
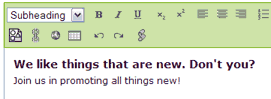 The result should be something like that in the illustration at the right: the current paragraph will be bold and larger.
If it doesn't look exactly like this, or what you want, play around! Get a feel for what the styling buttons do to the current paragraph or selected text.
Saving Your Work
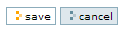
 Look at the bottom of the form to find the Save button, which will be in a group with Next and Cancel. Press the Save button.
After the server and its content-management system do a bit of work, you'll be returned to the View action page.
Note our new title, description and body text.
Log out, if you're done for now, or follow along in our next step.
Adding A Page
When we left off with the last portion of the tutorial, our new web site had one page, and looked something like this:

Note that the green-shaded content box and associated action options, along with the Recent Changes sidebar, would only be visible to a logged-in editor. If you're not logged in, do that now.
An About Page
Let's add a page to our site. A good choice for a first page is one describing your organization in more detail.
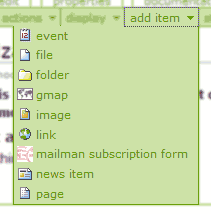 To add a page to the site, look in the green-shaded action options bar and find the Add Item drop-down menu. Drop down menus are indicated by the downward-pointing triangles. Click on Add Item to see the menu.
While the drop-down menu is visible, you'll see a list of content types. You add a particular kind of content by choosing the appropriate type from this list. In this case, we want to add a web page, so click on Page on the list.
For more information on the content types available, see the Adding Content How To.
The Edit Page Form
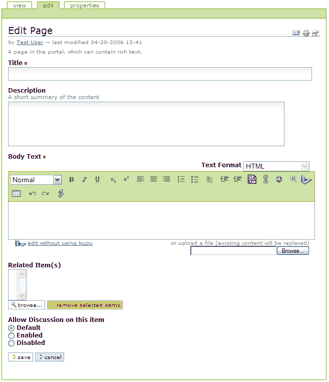
Choosing Page from the Add Item menu will take you to a form that will allow you to specify the page content. The form should look much like this:
Title & Description
 The first fields on the form are for the page's title and description. Our title here is simple: "About Us." Keep titles short and to the point. Long titles will make a mess of the site's left navigation sidebar (portlet).
Note that the title field works a bit differently than when you were editing the homepage. The title field of the homepage sets the title for the entire site. A page's title only affects the individual page.
The contents of the Description field shows up in several places (like when you hold the mouse for a second above a page's title) and in search results. Make it useful, but not too long.
Body Text
The Title and Description are plain text. The Body Text of a page may be richly styled to reflect structure and emphasis. You may enter the text in several formats, but if you're using a web browser with a rich-text control (like recent versions of Firefox, Camino and Internet Explorer) the easiest way to format text is using the What You See Is What You Get (WYSIWYG) editor. If it's available, you'll see a large green button bar.

As with the home page body text, the easiest way to style text is to enter it simply, then go back and use the style chooser to pick your headings and subheadings.
You may also copy formatted text from another browser window or word processor and paste it into the body text field. This works best with simply formatted text, and is a recipe for vexation if the pasted text has much in the way of margin or font manipulation.
Related Items
We're not going to do anything with the Related Items field at the moment, but keep it in mind. This field provides the answer to the question of How may I attach something else -- like a PDF form -- to a web page? The answer is to create a new File item, upload your PDF to it, then attach it to a page as a Related Item.
Allow Discussion ... ?
If you choose to allow discussion of a page, and if you've turned on anonymous discussion for your site, readers will be able to add comments to the page. If you allow this, remember that it is your responsibility to keep up with the comments.
Finishing Up
 Your work on the page isn't complete until you press the Save button at the bottom of the form. Don't forget about it!
The Results
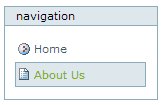 After you save your work, you'll be taken to the View display of your new page. Now, take a look at the site navigation sidebar on the left. There's the new page, automatically added!
Setting a Site-Wide Page Footer
It's conventional for web sites to have simple contact information at the bottom of each web page. Let's take care of that nicety.
If you haven't done so already, log in and navigate to your site's home page. Choose the Edit tab from the green-shaded action bar. You should see something like this:
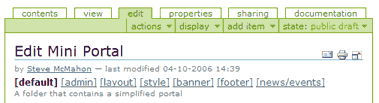
Take a look at the set of bracketed titles under the Edit Mini Portal title. These are all site administrative options. You already used one of them, [default] when you edited your home page text. Now, click on the [footer] link to get to the footer edit form:
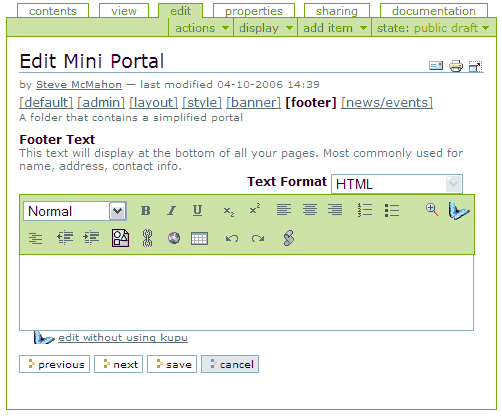
The footer edit form has only one field: a text editor (WYSIWYG if you're using a supported browser) that allows you to set your footer text. Click the cursor inside the field.
Look in the editor button bar for the Center icon (the centered stack of horizontal lines). Press it to indicate we want our text centered. Do the same to the B button to indicate that we want bold text.
Type your organization's name. Press the B button again to turn off the bold. Then press the Enter key to break the line. Add your organization's address and phone number, so that it looks something like this:
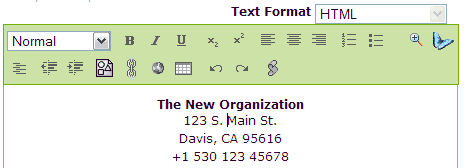
Look to the bottom of the form. Press the Save button to save your work. Then, take a look at the bottom of the page. You'll have a simple contact info footer that will show up on every page:

Adding News
Let's liven up our site by adding a news item. News Items are much like pages, with the additional feature that they're automatically listed on the News page (from the News tab) and shown in a sidebar on the homepage.
You may add news items anywhere in your site. They'll be automatically found and included in the appropriate listings. However, to help you get started with organizing your site, you may wish to add them to a special News and Events folder.
The News and Events folder is special because it's excluded from the site navigation listings. So, how do you find it?
Navigate to your site's home page, and choose the Contents tab. This will show you a listing of the contents of the site. You may use the Contents view to do many things: see hidden content, cut or copy items, reorder or delete them. In this case, we're just using it to find the normally hidden Contents folder.
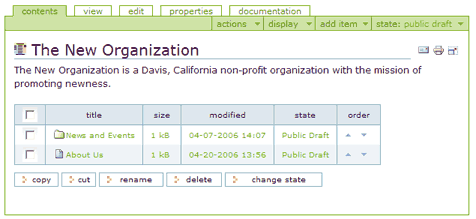
When you've spotted the News and Events folder, click on its title. This will take you to the folder. Now, when you add an item, it will appear in the News and Events folder.
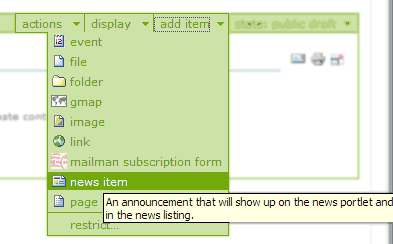 Go ahead and click on the Add Item option to cause the menu to drop down. Select News Item, and click on it to start the process of adding the news item.
The news item form is nearly identical to that of the Page content type. You'll see one difference: the addition of Image and Image Caption fields that allow you to add and title an image to illustrate your news item:
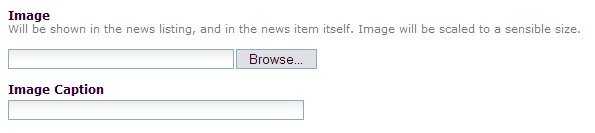
Fill in the Title, Description and Body Text fields as usual. Then, click on the Browse button associated with the image field. This will allow you to browse your computer to find an image for upload.
The most common type of image to go with a news item would be a photo. Photographs should typically be in JPEG (JPG) format. Ideally you will have edited them ahead of time to resize them to something reasonable in space and size.
Photos that you upload as parts of news items will be automatically resized to fit the page. So you don't have to get the size right ahead of time. Still, you really don't want to upload multiple megabyte, huge images to your website, so resize and compress before uploading.
After you've chosen an image file for upload, fill in a caption to label the photo. This is important step because the caption should help tell users who may not be able to see the photo what it's supposed to communicate.
After adding your caption, go ahead and click on save to store away your news item. Admire its view for a moment, then navigate to your homepage.
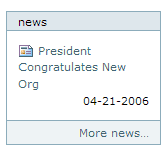 The homepage now has something new: a news sidebar (or portlet). This portlet will automatically list your most recent news items, from the most recent to the oldest. It also provides a link to your news page, which will have all your news items.
Making Blog-Style News
Blogs (weB Logs) have popularized the idea of a homepage that includes a list of news items, ordered from latest to oldest. It's a great way to make a web page dynamic. Let's make our homepage include a news listing.
If you're not looking at your homepage, navigate to it. Now, click on the Edit option in the shaded green option bar. Choose (and click on) the [news/events] item in the sub-form list.
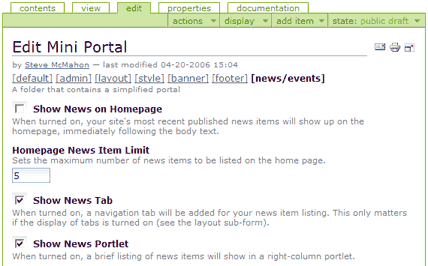
The News/Events setup form allows you to customize the way your site handles news and event content items. Click on the Show News on Homepage box to activate a homepage news listing. Also, uncheck the Show News Portlet option, as we don't need two news listings on the same page.
Press the Save button, and take a look at your new homepage, which should look something like:
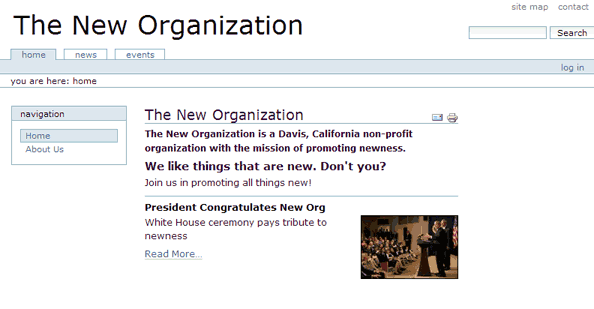
Your news listing will appear under the homepage's body text. The listing includes the title, description and image for each item. A Read More... link connects to the full item.
Note the image. It's a thumbnail of the (probably) larger photo you uploaded with your news items.
Future news items will sort to the top of the list. When you have more than a handful of news items, a link will connect the reader to the complete news listing page.